The Complete On-Page SEO Checklist for WordPress Websites
If you run a WordPress site and feel like your content deserves more visibility than it gets, you are not alone. Most websites struggle not because of poor content but because of fixable on-page issues that silently drag rankings down. This on-page SEO checklist for WordPress websites breaks the process into 10 clear, actionable steps that apply whether you are running a blog, a business site, or a full ecommerce store. Each item here is grounded in how search engines actually evaluate pages today, not in outdated tactics.
On-page SEO for WordPress covers everything from keyword placement and title tags to page speed, internal linking, and structured data. This checklist gives you 10 prioritized steps to audit and improve your site’s search performance. Work through them in order and you will fix the issues that matter most first.
⚡ Key Takeaways
- Your title tag and meta description are the first impression Google and users see. Get them right before anything else.
- Page speed is a confirmed ranking factor. Even a one-second delay can reduce conversions by up to 7% (Akamai, 2023).
- Internal linking distributes authority across your site and helps Google discover new content faster.
- Schema markup improves how your pages appear in search results, often increasing click-through rates without changing rankings.
- Image optimization is one of the most overlooked wins. Uncompressed images slow pages and waste crawl budget.
- Yoast SEO and Rank Math automate many checks but do not replace strategic human judgment.
- Content depth and topical relevance now matter more than keyword density. Write for people, optimize for bots.
1. Set Up and Configure an SEO Plugin Correctly
Before touching individual pages, your WordPress installation needs a solid SEO foundation. Plugins like Yoast SEO, Rank Math, or All in One SEO handle critical technical tasks including XML sitemap generation, canonical URL management, and meta tag control. Installing one is easy. Configuring it correctly is where most site owners fall short.
Start by connecting your plugin to Google Search Console. This gives you indexing data directly inside your dashboard. Next, set your site-wide title separator, configure breadcrumb settings, and make sure your homepage title and description reflect your primary keyword positioning. Check that the plugin is not accidentally noindexing pages you want ranked, which is a surprisingly common setup error.
Rank Math, for instance, offers built-in schema modules, redirect management, and 404 monitoring. Yoast remains the most widely used, with strong support documentation. Either works well, but running both simultaneously creates conflicts. Choose one and stick with it.
Also verify that your sitemap is submitted to Google Search Console and that it accurately reflects your live pages. If Google cannot find your content, nothing else on this list matters. Our guide on why Google is not indexing your page walks through common sitemap and crawl issues in detail.
💡 Pro Tip: After configuring your SEO plugin, run a quick crawl using Screaming Frog or Sitebulb to confirm your settings are working as expected before optimizing individual pages.
2. Optimize Title Tags and Meta Descriptions
Title tags remain one of the highest-impact on-page elements. According to Moz (2024), the title tag is among the top three factors Google uses to understand page relevance. Your target keyword should appear near the beginning of the title, within 60 characters total to avoid truncation in search results.
Meta descriptions do not directly influence rankings, but they directly influence click-through rates. A well-written meta description acts as ad copy for your page. It should include the primary keyword, a clear value proposition, and a subtle call to action, all within 155 characters. WordPress users can edit both fields easily through their SEO plugin on each post or page editor screen.
Avoid duplicate title tags across your site. Each page needs a unique title that reflects its specific content. This is especially common on ecommerce sites where product variations get their own URLs but share the same template-generated title. If you are managing a WooCommerce store, check our comparison of WooCommerce vs Shopify to understand how each platform handles SEO metadata differently.
One honest trade-off to acknowledge: writing unique titles for hundreds of pages takes time. Prioritize your highest-traffic and highest-converting pages first, then work through the rest systematically. A bulk edit plugin can speed up the process for large sites.
3. Use Headings Strategically, Not Decoratively
Headings give your content structure that both readers and search engines rely on. The H1 tag should appear once per page and include your primary keyword. Think of it as the topic declaration for the entire page. H2 tags mark major sections, while H3 and H4 tags break down subtopics within those sections.
Where most WordPress sites go wrong is treating headings as visual styling tools rather than semantic signals. They bold a line, change its font size, and call it an H2 without thinking about the information hierarchy being communicated. Screen readers and search engine crawlers both depend on proper heading structure to understand content organization.
Include related keywords and synonyms naturally in your H2 and H3 tags. Google’s natural language processing is sophisticated enough to connect “on-page optimization” with “on-page SEO” without you stuffing the same exact phrase into every heading. Use the full topic breadth instead.
For WordPress specifically, the Gutenberg editor makes it easy to assign heading levels through the block toolbar. Classic editor users should check the paragraph dropdown to confirm they are selecting H2 or H3 rather than applying bold to normal paragraph text, which looks similar visually but carries no semantic value.
4. Conduct Keyword Research and Place Keywords Naturally
Keyword research is the strategic step that makes all other on-page work purposeful. Without it, you are optimizing pages for topics that nobody searches for or competing on terms where you have no realistic chance of ranking. Tools like Ahrefs, Semrush, and Google Keyword Planner give you search volume, keyword difficulty, and related term data to guide decisions.
For each page, identify one primary keyword and three to five supporting or LSI keywords. Your primary keyword should appear in the title tag, the first 100 words of the body, at least one H2, the meta description, and the URL slug. Supporting keywords should appear naturally throughout the content. There is no magic keyword density percentage to hit. Google’s John Mueller confirmed in 2022 that keyword density is not a ranking signal the way it was a decade ago.
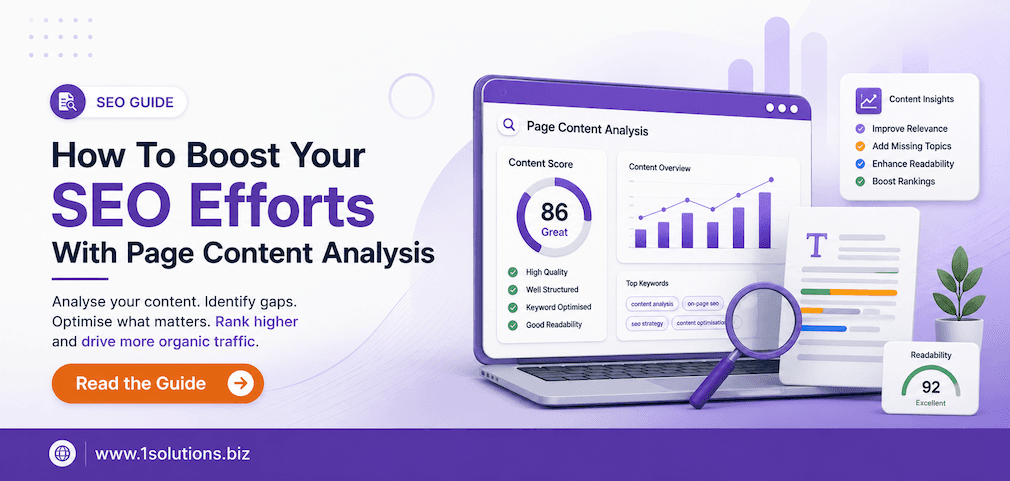
The more important factor now is topical depth. A page that thoroughly covers a subject, addresses related questions, and links to authoritative sources outperforms a page that simply repeats the same keyword every 100 words. For deeper guidance on content-level optimization, our post on how to boost SEO efforts with page content analysis is worth reviewing before you start writing.
5. Write High-Quality, Search-Intent-Aligned Content
Search intent is the reason behind a query. Someone searching “how to fix a slow WordPress site” wants a tutorial, not a product page. Someone searching “WordPress speed optimization service” wants to hire someone. Matching your content format and depth to the intent behind the keyword is one of the most underrated on-page factors.
Google’s Helpful Content system, fully integrated into its core algorithm as of 2024, specifically evaluates whether content was created to genuinely help users or primarily to rank. Thin content, content that answers questions only superficially, and pages that exist solely to target a keyword cluster all perform worse in this environment.
Practically speaking, aim for content that covers the topic better than what currently ranks. Read the top five results for your target keyword before writing. Note what they cover, what they miss, and where you can add original value through data, examples, or clearer explanations. According to HubSpot (2023), long-form content over 2,000 words generates 77% more backlinks than shorter articles on average, which reinforces the case for depth.
If producing consistent content at this level is a resource challenge, professional content and copywriting services can maintain both quality and publishing frequency without stretching your internal team.
💡 Pro Tip: Use Google’s “People Also Ask” section for your target keyword to find subtopics your content should address. Covering these questions increases your chances of appearing in featured snippets.
6. Optimize URLs, Slugs, and Permalink Structure
WordPress gives you full control over your permalink structure, and the default setting is not SEO-friendly. Out of the box, WordPress often uses numeric URLs like /?p=123, which communicate nothing to users or search engines. The first thing to change after installation is the permalink structure under Settings, and the recommended format is /post-name/ or /category/post-name/.
For individual page slugs, keep them short, descriptive, and keyword-rich. Remove stop words like “a,” “the,” and “of” where they add no meaning. A URL like /on-page-seo-checklist-wordpress performs better than /the-complete-guide-to-on-page-seo-for-your-wordpress-website because it is concise and scannable.
Never change a URL on a live page without setting up a 301 redirect. This is one of the most common causes of traffic drops after site redesigns. WordPress plugins like Redirection or your SEO plugin’s built-in redirect manager make this straightforward. Broken URLs waste crawl budget, lose link equity, and deliver 404 errors to real visitors.
Also consider URL consistency for category pages on WooCommerce or blog archives. These pages often compete with individual posts for the same keywords if not structured deliberately. Our WooCommerce store maintenance checklist covers URL and redirect management for ecommerce WordPress sites in more detail.
7. Optimize Images for Speed and Accessibility
Images are often the single largest performance bottleneck on WordPress sites. According to Google’s Web Almanac (2023), images account for over 75% of total page weight on the average website. Unoptimized images slow load times, hurt Core Web Vitals scores, and push pages down in mobile search results where speed is weighted heavily.
For each image you upload to WordPress, take four steps. First, compress the file before uploading using a tool like Squoosh or TinyPNG. Second, use modern formats like WebP instead of JPEG or PNG where possible. Third, add descriptive alt text that includes your keyword naturally where contextually appropriate. This improves accessibility for screen reader users and gives search engines another context signal. Fourth, set explicit width and height attributes to prevent layout shift, which affects your Cumulative Layout Shift score.
WordPress plugins like ShortPixel, Imagify, or Smush can automate compression on upload and convert existing images to WebP format. Enable lazy loading for images that appear below the fold so the browser only fetches them when needed. This measurably improves Time to First Byte and Largest Contentful Paint, both Core Web Vitals metrics that Google uses as ranking signals.
One trade-off worth noting: aggressive compression can reduce visual quality. Set your compression level to a point where the quality difference is not visible to most users, typically 80 to 85% quality for lossy compression.
8. Build a Strong Internal Linking Structure
Internal links do two important things. They help search engines discover and understand the relationship between your pages, and they pass authority from high-equity pages to pages that need a ranking boost. A well-structured internal linking strategy is one of the highest-return on-page activities you can do without creating new content.
For each new post or page you publish, add three to five internal links pointing to related content on your site. Use descriptive anchor text that reflects the topic of the destination page rather than generic phrases like “click here.” When you update older posts, add links from them to your newer content as well. This two-way linking approach distributes equity more evenly across your site.
Pillar pages and topic clusters are a widely used internal linking model. A pillar page covers a broad topic comprehensively, while cluster pages cover subtopics in depth and all link back to the pillar. This structure communicates topical authority to search engines and makes your site easier to navigate for users.
For a deeper dive into making internal links work harder for your rankings, our article on how to use internal links to boost backlink impact explains the mechanics clearly. The professional SEO services at 1Solutions include internal linking audits as a core deliverable for site optimization projects.
| On-Page Element | Priority Level | Impact on Rankings | Time to Implement |
|---|---|---|---|
| Title Tags and Meta Descriptions | Critical | High | Low |
| Content Quality and Depth | Critical | Very High | High |
| Internal Linking | High | High | Medium |
| Image Optimization | High | Medium-High | Low-Medium |
| Schema Markup | Medium | Medium | Medium |
| URL Structure | Medium | Medium | Low |
| Page Speed | Critical | High | Medium-High |
9. Improve Page Speed and Core Web Vitals
Page speed has been a Google ranking factor since 2010 for desktop and since 2018 for mobile. Core Web Vitals, introduced as ranking signals in 2021, measure three specific performance dimensions: Largest Contentful Paint (how fast the main content loads), Interaction to Next Paint (how quickly the page responds to user input), and Cumulative Layout Shift (how stable the layout is during loading). A page that fails on these metrics is at a structural disadvantage, regardless of how good its content is.
WordPress performance optimization involves several layers. Start with hosting. A slow server cannot be fixed with plugins. Choose a host that supports PHP 8.x, offers server-side caching, and is geographically close to your main audience. Next, install a caching plugin like WP Rocket, W3 Total Cache, or LiteSpeed Cache. These plugins generate static HTML versions of your pages so the server does not have to rebuild them on every request.
Enable a Content Delivery Network (CDN) to serve static assets from servers closer to each visitor. Cloudflare offers a free tier that covers most small to medium sites. Minimize render-blocking JavaScript and CSS by deferring non-critical scripts. Your caching plugin usually handles this, but check your PageSpeed Insights report to confirm.
According to Akamai (2023), a one-second delay in page load time reduces conversions by 7% and page views by 11%. These are not marginal losses. For ecommerce WordPress sites, fast pages translate directly to revenue. If your site needs a comprehensive speed and technical overhaul, our team at 1Solutions provides full-service WordPress development and optimization services designed for both performance and long-term SEO gains.
💡 Pro Tip: Use Google PageSpeed Insights alongside Google Search Console’s Core Web Vitals report. PageSpeed gives you diagnostic data per URL while Search Console shows field data aggregated from real users, and both perspectives matter for fixing performance issues.
10. Add Schema Markup and Structured Data
Schema markup is code added to your pages that helps search engines understand the type of content they are reading. It does not directly boost rankings in most cases, but it enables rich results such as star ratings, FAQ dropdowns, breadcrumb trails, and event details that appear directly in search results. These enhancements increase visibility and click-through rates substantially.
For WordPress sites, adding schema is manageable without custom coding. Rank Math includes built-in schema modules for articles, products, FAQs, how-to guides, local businesses, and reviews. Yoast SEO Premium covers some schema types, and the Schema Pro plugin is a dedicated option for more advanced use cases. If you are using WooCommerce, product schema including price, availability, and review data should be enabled and tested through Google’s Rich Results Test tool.
The most commonly useful schema types for WordPress sites include Article or BlogPosting for content pages, FAQPage for pages with question-and-answer sections, Product for ecommerce pages, LocalBusiness for service area businesses, and BreadcrumbList for improved navigation display. Start with the types most relevant to your primary page templates and expand from there.
As search engines evolve and AI-driven search features expand, structured data becomes increasingly important for how your content is interpreted and surfaced. Our article on how to improve website visibility in AI search engines explains the connection between structured data and emerging search formats. Pair schema implementation with other checklist items and you give each page the best possible chance of earning enhanced search appearances. If you want expert support applying these optimizations at scale, explore our SEO services for small businesses to see how a structured approach pays off over time.
Practical Action Plan: Where to Start
- Do This Now: Configure your SEO plugin correctly, fix missing or duplicate title tags, and submit your XML sitemap to Google Search Console. These three tasks directly affect whether Google can find and understand your content at all. Nothing else works if these are broken.
- Worth Doing: Compress and add alt text to all images on your top 10 highest-traffic pages, build internal links between related posts, and run a Core Web Vitals check to identify your worst-performing pages. These are high-impact improvements that do not require content rewrites.
- Low Priority: Adding schema markup to every page type, refining URL slugs on older low-traffic posts, and running keyword gap analysis for new content opportunities. These activities compound over time but will not move the needle as immediately as the items above.
Conclusion
Working through this on-page SEO checklist for WordPress websites is not a one-time event. It is an ongoing process of auditing, improving, and adapting as search algorithms evolve and your content library grows. The good news is that WordPress, with its ecosystem of plugins and themes, gives you more control over on-page factors than almost any other platform. The ten steps covered here range from foundational configuration to advanced structured data, and each one builds on the others. Start with what is broken, then move to what can be improved, and your rankings will follow. For staying current with how search is changing, our post on LLM optimization and ranking in AI search is a useful next read.
Frequently Asked Questions
How often should I audit my WordPress site for on-page SEO issues?
A comprehensive audit should happen at least twice per year. For active sites publishing new content weekly, a lighter monthly review of title tags, internal links, and Core Web Vitals scores keeps issues from accumulating. After any major WordPress update or theme change, run a full crawl immediately to catch anything that broke during the transition.
Is Yoast SEO or Rank Math better for WordPress on-page SEO?
Both are capable tools and the difference in ranking outcomes is minimal if configured properly. Rank Math offers more features in the free version, including schema modules and redirect management. Yoast has a larger support community and more extensive documentation. Choose based on your technical comfort level and site complexity, not based on claims that one magically outranks the other.
Do I need to hire an SEO expert or can I handle this checklist myself?
Most items on this checklist are manageable with intermediate WordPress knowledge. Plugin configuration, meta tag editing, image compression, and internal linking require no developer skills. Page speed optimization and schema implementation can get technical depending on your theme and hosting setup. If your site is large, competitive, or revenue-critical, professional guidance from an experienced team typically delivers faster and more reliable results.
How long does it take to see results from on-page SEO improvements?
Most on-page changes take three to six months to fully reflect in rankings because Google needs time to recrawl, reindex, and re-evaluate pages. Changes that affect crawlability, like fixing broken sitemaps or removing noindex tags, can show results faster, sometimes within days. Content improvements and internal linking changes tend to compound over several months rather than producing immediate jumps.
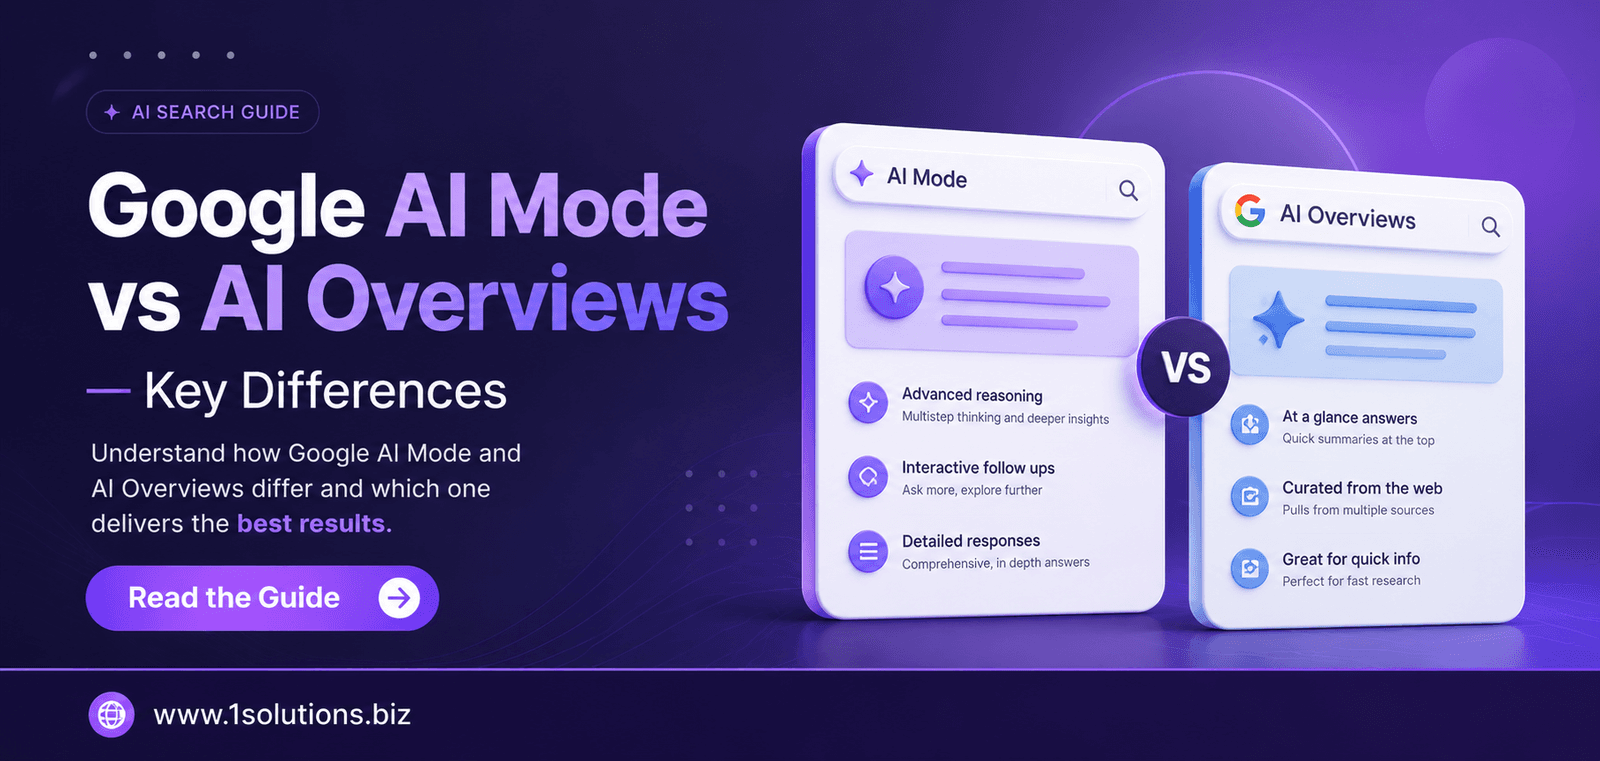
Does on-page SEO still matter now that AI is changing search?
Yes, arguably more than before. AI-powered search features like Google’s AI Overviews pull answers from pages that are clearly structured, topically authoritative, and technically sound. Those are exactly the qualities a strong on-page SEO foundation builds. Our analysis of Google AI Mode vs AI Overviews explains how these systems source content and why well-optimized pages continue to have an advantage in the new search landscape.