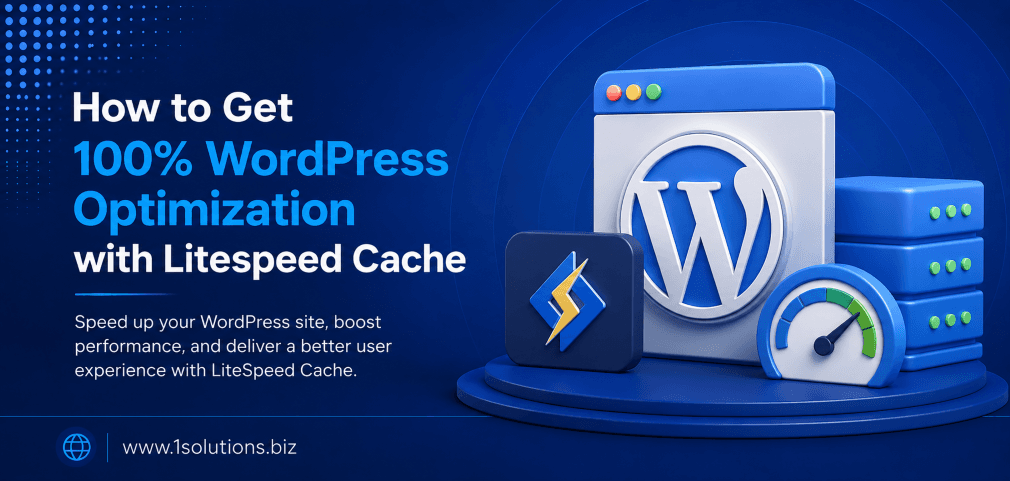
How to Get 100% WordPress Optimization with LiteSpeed Cache Plugin
If you have ever run a Google PageSpeed Insights test and stared at a score below 60, you know the frustration. WordPress optimization with LiteSpeed Cache Plugin is one of the most effective ways to push that score toward 100, reduce server load, and improve how Google ranks your site. This guide walks you through every major setting, in order, so you can configure the plugin without guessing.
LiteSpeed Cache is a free WordPress plugin that handles server-level caching, image optimization, CSS/JS minification, and lazy loading. Configured correctly, it can push PageSpeed scores to 90-100 and meaningfully improve Core Web Vitals. This guide covers every critical setting, in sequence, with honest notes on where trade-offs exist.
⚡ Key Takeaways
- LiteSpeed Cache works best on LiteSpeed or OpenLiteSpeed servers, but its optimization features still help on Apache and Nginx.
- Enable full-page cache first before touching minification or CSS/JS settings.
- Image optimization through SMUSH or the built-in WebP conversion is one of the highest-impact changes you can make.
- Defer JavaScript and combine CSS carefully. Aggressive settings frequently break WooCommerce, sliders, or contact forms.
- Core Web Vitals, especially LCP and CLS, improve most when you combine LiteSpeed Cache with a well-coded theme.
- Always test on a staging site before applying critical JS/CSS changes to production.
- A fast site supports every other digital channel, including SEO, paid ads, and conversion rate optimization.
Why WordPress Speed Optimization Matters for SEO
Page speed has been a confirmed Google ranking factor since 2010 for desktop and since 2018 for mobile. According to Google’s own research (Google, 2023), a one-second delay in mobile load time can reduce conversions by up to 20%. Portent (2023) found that a website loading in one second has a conversion rate five times higher than a site loading in ten seconds. And according to HTTP Archive (2024), the median mobile LCP for WordPress sites is still around 4.2 seconds, well above Google’s recommended 2.5-second threshold.
Speed is not just a technical vanity metric. It affects bounce rate, dwell time, crawl budget, and ultimately organic rankings. If you work with a professional WordPress development team, they will almost always include caching and performance optimization as part of a production build. But if you are managing your own site, LiteSpeed Cache gives you most of that capability for free.
For context on why rankings matter beyond speed, see our related guide on how to boost SEO efforts with page content analysis. Speed gets users to your page. Content keeps them there.
What Is LiteSpeed Cache and Who Should Use It
LiteSpeed Cache (LSC) is a WordPress plugin developed by LiteSpeed Technologies. It provides full-page caching at the server level, which is inherently faster than PHP-level caching used by plugins like W3 Total Cache or WP Super Cache. Beyond caching, it includes:
- CSS, JavaScript, and HTML minification
- Image optimization and WebP conversion
- Lazy loading for images and iframes
- Database optimization
- Critical CSS generation
- CDN integration (via QUIC.cloud)
- Object caching (Redis/Memcached)
The server-level caching component only works on LiteSpeed Web Server or OpenLiteSpeed. If your host runs Apache or Nginx, the plugin still delivers value through its front-end optimization tools, but you lose the server-level cache advantage. Check with your hosting provider before assuming full compatibility.
Step 1: Install and Activate LiteSpeed Cache
Go to your WordPress dashboard, navigate to Plugins, click Add New, and search for “LiteSpeed Cache.” Install and activate the official plugin by LiteSpeed Technologies. Once activated, a new “LiteSpeed Cache” menu item appears in your sidebar.
Before changing any settings, do two things. First, run a PageSpeed Insights test on your homepage and one inner page. Screenshot the results. This gives you a baseline to compare against after optimization. Second, if you have another caching plugin active (WP Rocket, W3 Total Cache, etc.), deactivate it to prevent conflicts.
💡 Pro Tip: Run your baseline PageSpeed test with the browser cache cleared and from an incognito window. Cached browser data can inflate your starting score and give you a false comparison baseline.
Step 2: Configure the Cache Settings
Go to LiteSpeed Cache, then Cache. This is the most important section. Here is what to enable and what to watch out for:
Enable Full-Page Cache
Turn “Enable Cache” to ON. This is the single highest-impact setting in the entire plugin. When a page is cached, LiteSpeed serves a pre-built static HTML file instead of running PHP and database queries on every request.
Cache for Logged-In Users
Leave this OFF by default. Caching logged-in sessions can cause users to see each other’s data in edge cases. Enable it only if you have a membership site and understand how user-specific cache works.
Cache Mobile
Enable “Cache Mobile” if your theme is fully responsive. If your site serves a separate mobile theme (less common today), leave it off and configure a separate mobile cache rule.
Cache TTL
The default Time-To-Live is 604800 seconds (7 days). This is reasonable for most sites. If you publish frequently, you can reduce it to 86400 (1 day). For ecommerce sites, cart and checkout pages should be excluded from cache entirely. LiteSpeed handles WooCommerce exclusions automatically in most cases, but verify this manually.
Browser Cache
Under the “Browser” tab within Cache settings, enable browser cache. This tells repeat visitors’ browsers to store static assets locally. Set the TTL to 31557600 seconds (1 year) for assets like fonts, images, and CSS that rarely change.
Step 3: Minification and Combination of CSS and JavaScript
Navigate to LiteSpeed Cache, then Page Optimization. This section has the most settings and the most risk of breaking your site. Approach it methodically.
CSS Settings
- Minify CSS: Enable. This removes whitespace and comments from CSS files.
- Combine CSS: Enable with caution. It merges multiple CSS files into one, reducing HTTP requests. Test thoroughly on all page types after enabling this.
- Generate Critical CSS: Enable. This feature loads above-the-fold styles inline so the visible portion of the page renders faster. It is one of the strongest LCP improvements available.
JavaScript Settings
- Minify JS: Enable.
- Combine JS: Enable with extreme caution. Many plugins use JavaScript that breaks when combined. If your site shows errors after enabling, use the JS Excludes field to add problematic scripts.
- Defer JS: Enable. Deferred scripts load after the HTML is parsed, directly improving Time to Interactive.
- Defer jQuery: Leave OFF. jQuery is a dependency for many plugins and themes. Deferring it causes scripts that depend on it to fail.
💡 Warning: After enabling any CSS or JS combination settings, test your contact forms, navigation menus, sliders, and checkout flow. These are the most frequently broken components. If something breaks, use the Exclude fields to remove specific scripts or stylesheets from optimization.
HTML Settings
Enable HTML minification. This is low-risk and simply removes unnecessary whitespace from the HTML output. Enable “Remove Query Strings” to improve cache efficiency for static assets.
Step 4: Image Optimization
Images are the single largest contributor to page weight on most WordPress sites. LiteSpeed Cache addresses this through two primary features.
Lazy Loading
Go to Page Optimization, then Media. Enable “Lazy Load Images.” This defers the loading of below-the-fold images until the user scrolls toward them. Enable “Lazy Load Iframes” as well. Disable lazy loading for the LCP image specifically, as lazy-loading your largest above-the-fold image will hurt your LCP score rather than help it. Use the “Lazy Load Excludes” field to exclude your hero image or logo.
Image Optimization via QUIC.cloud
Navigate to LiteSpeed Cache, then Image Optimization. This feature connects to QUIC.cloud, LiteSpeed’s CDN and optimization service. It converts images to WebP format and compresses originals. The free tier allows a set number of image credits per month, which is sufficient for small to medium sites. For large image libraries, you may need to purchase additional credits.
Click “Send Unoptimized Images” to queue your images for processing. Once complete, click “Pull Optimized Images.” Enable “WebP Replacement” so browsers that support WebP receive the lighter format automatically.
Step 5: Database Optimization
WordPress accumulates database overhead over time: post revisions, transients, spam comments, orphaned metadata, and auto-draft posts. LiteSpeed Cache includes a built-in database cleaner.
Go to LiteSpeed Cache, then DB Optimizer. Review each category before deleting. Post revisions are safe to clean (keep the most recent two or three). Transients and expired options are also safe. Orphaned metadata requires more care if you use custom post types or page builders heavily.
Do not run the optimizer without a fresh database backup. This is a basic rule that applies to every optimization tool, not just LiteSpeed.
Step 6: Configure Object Cache and CDN
Object Cache
Object caching stores the results of database queries in memory so they do not need to be re-run on every page load. LiteSpeed Cache supports Redis and Memcached. Go to LiteSpeed Cache, then Advanced, then Object Cache. If your hosting plan includes Redis, enable it here and enter the connection details. This is most impactful on dynamic sites with many logged-in users, WooCommerce stores, or sites using complex queries.
CDN Integration
A Content Delivery Network serves static assets from servers geographically closer to each visitor. LiteSpeed Cache integrates natively with QUIC.cloud. You can also configure it to work with Cloudflare or any third-party CDN by entering your CDN URL under LiteSpeed Cache, then CDN settings.
For ecommerce sites in particular, CDN integration combined with LiteSpeed Cache is one of the most effective performance stacks available. If you are looking to improve your store’s performance and rankings together, our ecommerce SEO packages cover technical optimization as part of a broader growth strategy. You may also want to review our comparison of WooCommerce vs Shopify if you are still evaluating platforms.
Step 7: Core Web Vitals Tuning
Google’s Core Web Vitals include three metrics: Largest Contentful Paint (LCP), Cumulative Layout Shift (CLS), and Interaction to Next Paint (INP). LiteSpeed Cache directly influences all three.
| Core Web Vital | Target | LiteSpeed Cache Setting That Helps |
|---|---|---|
| LCP (Largest Contentful Paint) | Under 2.5 seconds | Full-page cache, Critical CSS, exclude hero image from lazy load |
| CLS (Cumulative Layout Shift) | Under 0.1 | Specify image dimensions, limit font swapping, careful CSS combination |
| INP (Interaction to Next Paint) | Under 200ms | Defer JS, object cache, reduce third-party scripts |
For CLS specifically, LiteSpeed Cache settings alone are not enough. Your theme needs to include explicit width and height attributes on all images. Most modern themes do this by default, but older or custom themes may not. Check your CLS score in PageSpeed Insights and look at the flagged elements.
💡 Pro Tip: Use Chrome DevTools’ Performance panel alongside PageSpeed Insights. PageSpeed gives you a score; DevTools shows you exactly which resource is delaying render and at what millisecond. Combine both tools for faster diagnosis.
Step 8: Advanced Settings and Exclusions
Navigate to LiteSpeed Cache, then Advanced. Key settings here include:
- Instant Click: This feature preloads pages when a user hovers over a link, making navigation feel instantaneous. Enable it for content-heavy sites. Use carefully on sites with dynamic pricing or stock levels, as preloaded pages may show outdated data.
- Cache Purge Rules: Define which actions trigger a full cache purge. By default, publishing a new post clears related pages. You can add custom rules for specific post types.
- Crawler: LiteSpeed’s built-in crawler visits your pages after a cache purge and rebuilds the cache proactively. This prevents the first user after a purge from experiencing a slow uncached page load. Enable the crawler under LiteSpeed Cache, then Crawler.
Practical Action Plan: Priority Tiers
Not every setting carries the same weight. Here is how to prioritize if you are short on time:
- Do This Now: Enable full-page cache, enable browser cache, enable lazy loading (with hero image excluded), and run image optimization through QUIC.cloud. These four actions alone account for 60-70% of the available performance gain.
- Worth Doing: Enable CSS and JS minification, generate Critical CSS, enable Defer JS (excluding jQuery), configure the database optimizer, and set up the crawler. These settings require testing but deliver meaningful improvements to Core Web Vitals scores.
- Low Priority: Configure object caching (unless you run a high-traffic or ecommerce site), set up QUIC.cloud CDN (valuable but requires an account setup), and fine-tune Instant Click. These are worthwhile but only after the higher-priority items are stable.
What LiteSpeed Cache Cannot Fix
It is worth being honest here. LiteSpeed Cache is powerful but not a complete solution by itself. It cannot fix:
- A bloated or poorly coded theme with hundreds of render-blocking requests
- Slow hosting with inadequate server resources
- Third-party scripts (chat widgets, tracking pixels, analytics libraries) that block render
- Unoptimized database queries generated by low-quality plugins
- Missing image dimensions that cause layout shifts
If your PageSpeed score is stuck in the 50s or 60s even after configuring LiteSpeed Cache fully, the issue is almost certainly at the theme or hosting level, not the plugin level. A proper technical audit from an experienced search engine optimization team can identify root causes that plugin settings alone cannot address.
For context on how page performance connects to broader indexing and visibility issues, our article on why Google is not indexing your page covers related technical factors worth reviewing. And if you are working on structured content alongside speed, see our guide on SEO strategies for Google News article ranking.
Conclusion
Achieving 100% WordPress optimization with LiteSpeed Cache Plugin is a realistic goal for most sites, provided you approach it in the right order and test after each major change. Start with full-page cache and image optimization. Layer in CSS and JS improvements carefully. Validate your Core Web Vitals in PageSpeed Insights after each change. And accept that the plugin works best as part of a broader performance strategy that includes good hosting, a lightweight theme, and minimal third-party scripts.
The return on investment is real. Faster sites rank better, convert better, and cost less to serve. Whether you manage your site independently or work with a development partner, the steps in this guide give you a clear, actionable path to measurable improvements.
Frequently Asked Questions
Does LiteSpeed Cache work on non-LiteSpeed servers?
Yes, partially. The front-end optimization features, including minification, image optimization, lazy loading, and Critical CSS, work on any server. The server-level full-page caching component only works on LiteSpeed Web Server or OpenLiteSpeed. On Apache or Nginx, full-page cache is handled at the PHP level, which is slower but still better than no cache.
Can I use LiteSpeed Cache with Cloudflare?
Yes. LiteSpeed Cache and Cloudflare are compatible. However, you should disable Cloudflare’s own minification settings if you enable minification in LiteSpeed Cache to avoid double processing. Configure LiteSpeed Cache to purge correctly when you deploy Cloudflare as a proxy.
Will LiteSpeed Cache break my WooCommerce store?
LiteSpeed Cache automatically excludes cart, checkout, and account pages from caching for WooCommerce. In most cases, it is compatible out of the box. The settings most likely to cause issues are CSS/JS combination and Defer JS. Test the full checkout flow on a staging site before pushing changes to production.
How long does it take to see PageSpeed improvements after configuration?
Most changes take effect immediately after the plugin cache is cleared and rebuilt. PageSpeed Insights scores should reflect improvements on the next test. Core Web Vitals in Google Search Console are based on real-user data collected over 28 days, so those metrics will take longer to update even if the technical improvements are in place immediately.
Is the free version of LiteSpeed Cache enough, or do I need the paid QUIC.cloud plan?
The free version covers the vast majority of use cases, including full-page caching, minification, lazy loading, and a limited number of monthly image optimization credits. QUIC.cloud paid plans add more image optimization credits, CDN bandwidth, and priority processing. For most small to medium sites, the free tier is sufficient. High-traffic or image-heavy sites will benefit from a paid plan.