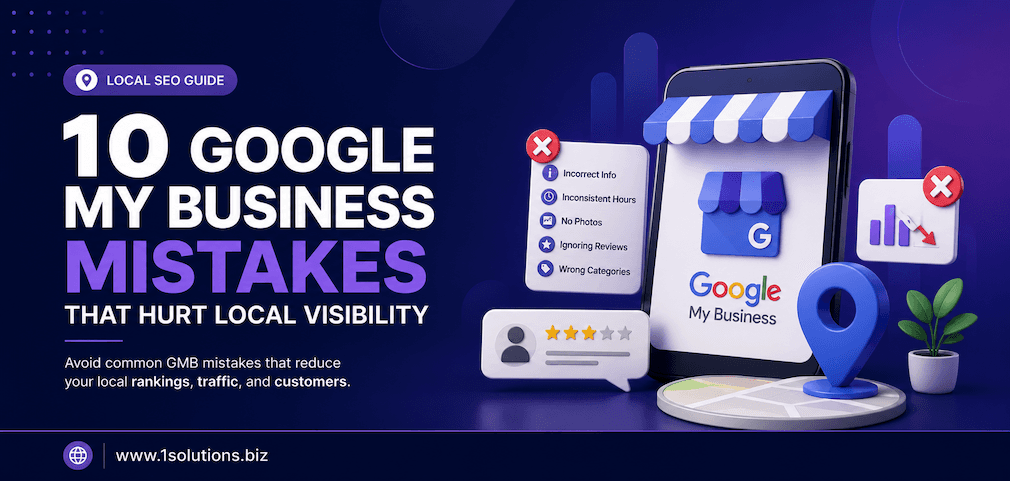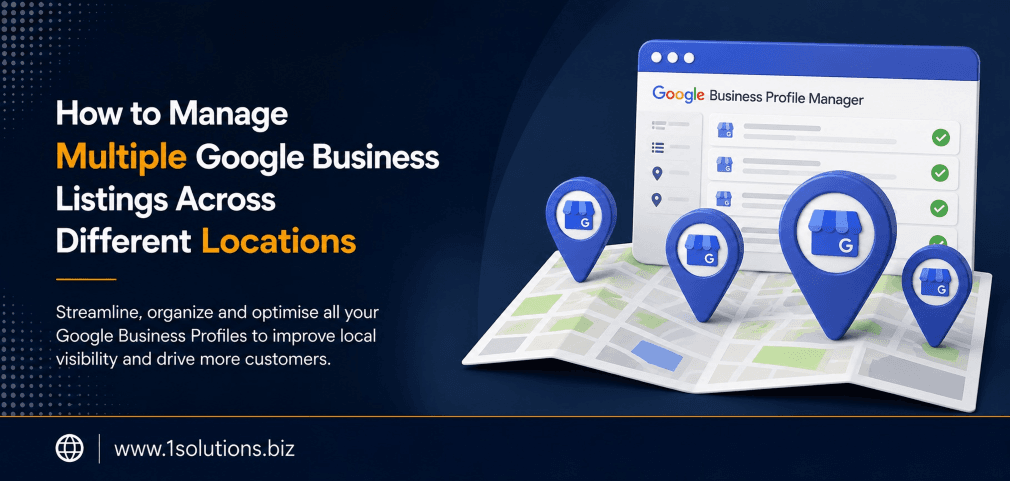
If you run a business with more than one physical location, you already know the challenge: keeping every Google Business Profile accurate, optimized, and active is a full-time job on its own. Learning how to manage multiple Google Business listings across different locations is not just a nice-to-have skill. It is a direct driver of local search visibility, customer trust, and foot traffic. Get it wrong and you risk duplicate listings, inconsistent information, and a local SEO presence that actively works against you.
Managing multiple Google Business Profile listings requires a centralized account structure, bulk verification tools, and consistent NAP (Name, Address, Phone) data across every location. This guide walks you through the exact steps to set up, optimize, and maintain multi-location profiles without losing control of your local search presence.
⚡ Key Takeaways
- Use a single Google Business Manager account to control all location profiles from one dashboard.
- Bulk verification is available for businesses with 10 or more locations, saving significant time.
- NAP consistency across all listings is non-negotiable for local ranking signals.
- Each location needs its own unique description, photos, and category selections.
- Regular audits catch duplicate listings and outdated information before they damage rankings.
- Responding to reviews on every location profile is a ranking and trust factor.
- Third-party tools like Yext or BrightLocal can streamline management at scale.
Why Multi-Location Google Business Management Matters for Local SEO
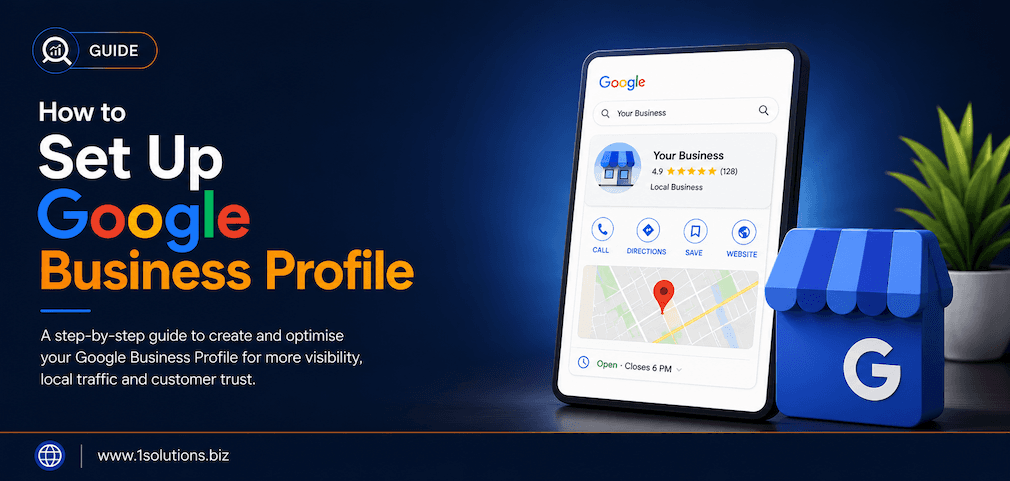
Google Business Profile (formerly Google My Business) is the single most visible local SEO asset for any brick-and-mortar or service-area business. According to BrightLocal (2023), 98% of consumers used the internet to find information about local businesses, and Google Maps was the most trusted source for that discovery. For a multi-location brand, each profile is essentially its own mini-website in Google Search and Maps results.
The problem is that scale introduces complexity. Inconsistent hours, wrong addresses, missing photos, and duplicate listings are all common failure points. Research from Moz (2023) confirmed that consistent NAP data remains one of the top local ranking factors, meaning a single location with outdated information can drag down customer trust and conversions for your entire brand.
Before diving into the step-by-step process, it helps to understand the common mistakes businesses make. Our post on 10 Google My Business mistakes that hurt local visibility covers the most frequent errors in detail, and many of them are amplified when you are managing five, ten, or fifty locations at once.
Step 1: Set Up a Business Manager Account as Your Central Hub
The foundation of managing multiple Google Business listings is a single Business Profile Manager account. This is Google’s dashboard that lets you add, edit, and monitor all location profiles without logging into each one separately.
- Go to business.google.com and sign in with a dedicated Google account, not a personal one.
- Click Add Business and select Add multiple businesses if you are adding several at once.
- Create a Business Group (formerly called a location group) to organize profiles by region, brand, or franchise unit.
- Assign user roles carefully. Use Owner access only for core team members and Manager or Site Manager roles for location-level staff.
💡 Pro Tip: Never use a personal Gmail account as the primary owner of your Business Manager. If that employee leaves, recovering ownership is a lengthy and painful process. Always use a company-owned Google Workspace account.
Keeping access tightly controlled is especially important for brands that work with external agencies. When you partner with a team handling your local SEO across multiple locations, granting Manager-level access through Business Manager protects you from losing control of your profiles.
Step 2: Add and Verify Each Location Correctly
Verification is where most multi-location setups stall. Google requires you to prove that each physical location is real and operational. Here is how to handle this efficiently:
For Fewer Than 10 Locations
- Use the standard postcard, phone, or email verification methods for each individual listing.
- Postcard verification takes 5 to 14 days, so plan ahead before launch.
- Ensure someone at each physical address is expecting the postcard and knows what to do with the verification code.
For 10 or More Locations
- Apply for bulk verification through Google’s Business Profile Manager.
- You will need to submit a verification form with your business details and a spreadsheet of all locations.
- Google may require a video call or additional documentation for new brands without an existing verified presence.
One critical rule: never create duplicate listings for the same physical address. Google’s systems detect duplicates and can suspend both listings, leaving you with zero visibility. If you acquire a business that already has a listing, claim the existing one rather than creating a new profile.
Step 3: Build a Consistent and Location-Specific Data Structure
This step is where the real optimization work happens. Consistency and uniqueness need to coexist. Your NAP data must be identical across every listing and across your website, but each location’s description, photos, and posts should be customized.
What Must Be Consistent Across All Locations
- Business name format (no keyword stuffing in the name field)
- Phone number format
- Address format matching your website and local citations
- Primary business category
- Website URL structure for location pages
What Should Be Unique Per Location
- Business description (highlight local team, specialties, or neighborhood)
- Photos showing the actual storefront, staff, and interior of that location
- Secondary categories if certain locations offer different services
- Google Posts promoting location-specific events or offers
| Element | Consistent Across All Listings | Unique Per Location |
|---|---|---|
| Business Name | Yes | No |
| Primary Category | Yes | Conditionally |
| NAP Data | Yes | Address varies naturally |
| Business Description | No | Yes |
| Photos | No | Yes |
| Google Posts | No | Yes |
| Hours of Operation | No | Yes |
| Website URL | Root domain consistent | Location-specific page URL |
Step 4: Create Dedicated Location Pages on Your Website
Every Google Business Profile should link to a dedicated location page on your website, not to your homepage. This is one of the most overlooked steps in multi-location SEO, and it has a direct impact on how well each listing ranks.
A proper location page includes the full address, phone number, hours, a Google Maps embed, staff names if appropriate, and unique content about that specific location. Avoid copying and pasting the same paragraph across every location page. Google (and users) will notice.
If your website is built on WordPress, managing separate location pages at scale is straightforward with the right theme and plugin setup. If you need help structuring this properly, our WordPress development services can build a scalable location page architecture that integrates cleanly with your Google Business Profiles.
The principle of unique, useful content on every page also applies to your broader local SEO strategy. Our guide on local AEO best practices for small businesses explains how to structure content so it answers the exact questions local customers are asking, which feeds directly into how Google ranks your location profiles.
💡 Pro Tip: Use schema markup (LocalBusiness schema) on each location page with the exact NAP data that matches your Google Business Profile. This reinforces the signal Google needs to confidently rank your listings for local queries.
Step 5: Use Bulk Management Tools for Efficiency
Once you have more than five or six locations, manual updates become a liability. A single hour change across 20 locations means 20 separate edits if you do it by hand. Tools exist specifically to solve this problem.
Google’s Native Bulk Tools
- Bulk upload spreadsheet: Add or edit multiple locations using a Google Sheets template directly inside Business Profile Manager.
- Bulk actions: Apply the same update (such as holiday hours) to multiple selected listings simultaneously.
- Insights export: Download performance data for all locations into a single spreadsheet for analysis.
Third-Party Platforms Worth Considering
- BrightLocal: Excellent for citation management and review monitoring across all locations.
- Yext: Syncs data across Google, Apple Maps, Yelp, Bing, and dozens of other directories from one dashboard.
- Semrush Listing Management: Useful if you are already using Semrush for broader SEO tracking.
- Whitespark: Strong focus on citation building and local ranking tracking per location.
According to BrightLocal’s Local Search Industry Survey (2023), 61% of local SEO professionals use at least one third-party tool to manage client listings, citing time savings and error reduction as the primary benefits. The investment is usually justified once you pass five locations.
Step 6: Build a Review Management System for Every Location
Reviews are one of the strongest local ranking signals and one of the hardest things to manage at scale. Each location needs its own review strategy, not a one-size-fits-all approach.
A consistent review management system should include:
- A review request process built into post-purchase or post-visit workflows at each location.
- Response templates that location managers can personalize, so every review gets a response within 48 hours.
- Escalation protocols for negative reviews, so nothing sits unanswered for more than a day.
- Monthly review volume tracking per location to identify underperforming sites that need extra attention.
If your brand relies heavily on reputation across multiple touchpoints, investing in professional online reputation management can make a measurable difference. A structured approach to review generation and response is especially valuable for franchise models and service chains where a single bad location can affect overall brand perception.
💡 Warning: Never use the same review response copy-pasted across multiple locations. Google’s systems and real users both detect this, and it signals low effort. Personalize every response, even if you use a template as a starting point.
Step 7: Audit, Monitor, and Maintain All Listings Regularly
Setting up your listings correctly is only half the job. Google allows users to suggest edits to business profiles, and those edits can go live without your approval. This means your carefully maintained listings can change underneath you without warning.
Monthly Audit Checklist
- Verify NAP accuracy on all listings (cross-check against your website)
- Check for any user-suggested edits that have been applied
- Confirm hours are correct, especially around holidays
- Look for duplicate listings using Google Maps searches for each location address
- Review photo uploads by users and remove inappropriate content
- Check that the primary category and attributes are still accurate
- Export Insights data and compare performance across locations
Quarterly Deep Audit
- Review all secondary categories for each location
- Update business descriptions to reflect any service or product changes
- Refresh photos with new, high-quality images showing current branding
- Assess the Q and A section and add or update frequently asked questions
Monitoring your listings’ search performance connects directly to your broader SEO strategy. Local profile performance data, such as direction requests, phone calls, and website clicks per location, gives you granular insight into which locations are thriving and which need more attention.
Step 8: Use Google Posts to Keep Each Location Profile Active
Google Posts are short updates that appear directly on your Business Profile in search results. They expire after seven days for standard posts and can be used for offers, events, product highlights, and general updates.
For multi-location businesses, Google Posts serve two purposes: signaling to Google that the profile is active, and giving customers location-specific reasons to visit or call. A location running a specific promotion or hosting a local event should post about it separately from the brand-wide feed.
Building a content calendar for Google Posts across multiple locations is part of a broader content strategy. If your team is stretched thin, our content and copywriting services can handle location-specific post creation as part of a structured content plan.
Practical Action Plan: What to Do and When
- Do This Now: Audit all existing listings for NAP accuracy and duplicate profiles. Inconsistent or duplicate data is actively harming your rankings today. Fix the address, phone, and website fields across every listing before touching anything else.
- Do This Now: Ensure every listing links to a unique, content-rich location page on your website, not the homepage. This is a low-effort, high-impact change.
- Worth Doing: Set up a third-party listing management tool if you have more than five locations. The time savings compound quickly, and the citation consistency benefits are significant.
- Worth Doing: Build a review request workflow into your customer touchpoints. Even a simple follow-up email or SMS asking for a review can increase review volume by 20 to 30% per location (BrightLocal, 2023).
- Worth Doing: Add LocalBusiness schema markup to every location page on your website. This reinforces your profile data and can improve how Google displays your information in rich results.
- Low Priority: Experiment with Google Posts once the core setup is solid. Posts matter, but not more than accurate data and active review management.
- Low Priority: Explore Google Business Profile’s product and service catalogs for locations where this feature adds genuine value. It is useful but not urgent until the foundation is in place.
As AI-driven search features become more prominent, the way your business appears in local and generative search results is evolving. Understanding tools like those described in our post on local answer engine optimization practices can help future-proof your multi-location presence beyond traditional Google Business Profile management.
Conclusion
Knowing how to manage multiple Google Business listings across different locations is one of the highest-leverage skills for any multi-location brand. It combines technical setup, consistent data management, content strategy, and ongoing monitoring into a system that, when done correctly, produces compounding local search visibility over time.
The key is to build a structure that scales: a centralized account, standardized processes, unique content per location, and a regular audit cadence. It takes upfront investment, but the alternative, leaving listings unmanaged, guarantees lost traffic, customer confusion, and missed revenue at every underperforming location.
If the scope feels overwhelming, especially for brands with ten or more locations, working with a team that specializes in scalable local SEO packages can accelerate the process and ensure every location profile is working as hard as it should be.
Frequently Asked Questions
Can I manage all my Google Business locations from one account?
Yes. Google Business Profile Manager allows you to create Business Groups that house all your location profiles under a single dashboard. You can add team members with different permission levels so the right people manage the right locations without giving full access to everyone.
How do I verify multiple Google Business locations at once?
If you have 10 or more locations under the same brand, you can apply for bulk verification through Google Business Profile Manager. You will submit a form and a spreadsheet of your locations. Google reviews the application and, once approved, verifies all locations at once rather than requiring individual postcard or phone verification for each.
What happens if two of my listings show duplicate information?
Duplicate listings confuse both customers and Google. They split your review equity, dilute your local ranking signals, and can trigger a suspension of one or both listings. If you find duplicates, request removal of the duplicate through Google Maps or flag it inside Business Profile Manager. Never just abandon one without formally removing it.
How often should I update my Google Business listings?
At minimum, do a full audit monthly and a deeper review quarterly. Additionally, update listings immediately whenever there is a change in hours, address, phone number, or services. Holiday hours should be scheduled in advance using the Special Hours feature inside Business Profile Manager so customers always see accurate information.
Do I need a separate website page for every business location?
Yes, and this is non-negotiable for serious local SEO. Each Google Business Profile should link to a unique location page with specific NAP data, local content, and ideally customer reviews or testimonials relevant to that location. Linking all profiles to your homepage wastes the local relevance signal and hurts rankings for every location except the one Google arbitrarily associates with the root domain.