


WordPress is now unarguably the most popular content management system in the world. Be it the beginner in the blogging world or the professional bloggers, WordPress is the blogging platform of choice for all. It’s a CMS based on PHP and SQL. Introduced in 2003, it offers its users customized themes, various plugins, mobile-friendly, and search engine friendly too. Nowadays there are several development companies offering an effective web presence with their WordPress development services.
The required plugins for enhancing WordPress features are easily available and downloaded from the Internet. Powering more than 24% of the Internet, it caters to all. Personal websites, corporate websites, news websites, and blogs are mostly built on WordPress these days. WordPress also facilitates eCommerce stores development using its WooCommerce extension and there are several companies that offer affordable WooCommerce store design services to set up your online store. Being multilingual makes it popular across the globe in most countries. The ease of use for users and publishers along with the hidden complexity for developers makes it an ideal choice.
Every web hosting environment in the world poses one kind of error or the other to its users and if you are a WordPress user then there is a greater probability that you might have encountered a ‘Disk Error’. This error is not a cause of much concern. This error occurs when the user tries to upload a file as an admin or sub-admin. When this error crops up it is quite frustrating for the users, disrupting the otherwise effortless experience of blogging at WordPress.
In this blog, we will explain the reasons why users encounter this error and the various alternatives available for users and developers to solve it.
Reasons for Upload: Failed to Write File to Disk Error in WordPress
When a user encounters this error, there may be a number of reasons and amongst those, the most common ones have set incorrect permissions to files or folders. One can summarize all those reasons under three common points:
- Permissions setting to the upload directory.
- The user exceeds the granted quota or hard drive of the server has no space left
- The tmp folder of the server has no space left.
For a WordPress website, we have to set permissions to each and every file and folder. The access to all these files and folder is controlled by the web server which further works as per the permission settings done by us. So whenever a file or a folder has been given incorrect permissions, the user cannot write or modify it on the server. In other words, we can say that our web server fails in the addition or creation of new files to the given folder.
So in such a scenario, when the user of WordPress attempts to upload images or files as admin, either of the following three error messages is encountered:
- WP has failed to upload due to disk error
- Unable to create directory
- WP failed to write to disk
How to fix ‘Upload: Failed to Write File to Disk Error in WordPress?
 First, the user should attempt to connect to the WordPress site with the help of an FTP client. FTP refers to File Transfer Protocol. In simple words, an FTP client is basically software developed with the purpose of making two computers communicate with the help of the Internet. You can easily send and receive files through this server. So technically speaking, this protocol works on TCP/IP protocol only. For this to work, you need FTP software and an FTP server. The connection created between the server and the client, you can download, upload, rename, modify and delete files. Generally, FTP software is supported by all computers.
Before you start using the FTP client make sure you have the information/details of the Server, Remote Directory, Username, and Password.
You receive these details once you sign up for the Server account. It’s pertinent to understand, that only the ‘/public_html directory’ be used for uploading your files. The ‘.cgi-bin directory’ folder’s purpose is to upload cgi scripts and all servers, like our regular passwords are sensitive to upper and lower case. Lastly, the FTP program should not be set to SFTP instead of FTP and after naming your homepage as ‘index.html to ‘/cgi-bin directory’.
Various free FTP clients are available like Cyberduck, CuteFTP, Transmit (for MAC), WinSCP (for Windows), FileZilla, etc. We will be using the FileZilla FTP client to illustrate to you to fix the ‘Failed to Write File to Disk Error’.
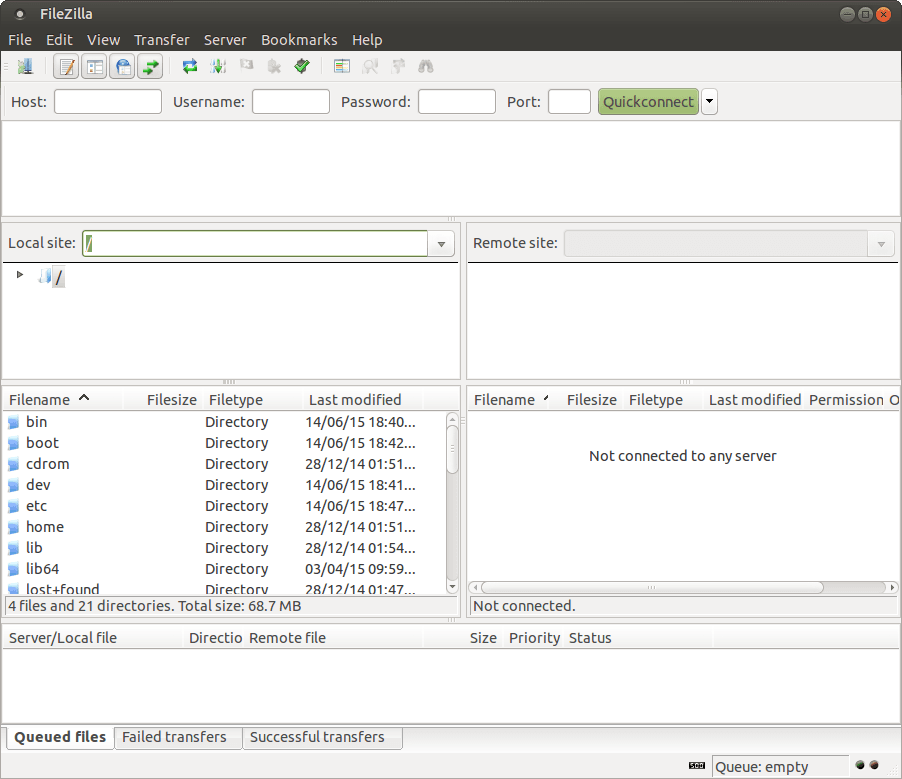
Connect to FileZilla FTP client and once that is done, find the wp-content folder. You need to click on the wp-content folder and select ‘file permissions’ which will be the last option in the list that pops up. In order to select ‘file permissions’, it will make a dialog box appear in the FTP client. The file permission for the owner, group, and public will be shown separately. The file permissions will have ‘read’, ‘write’, and ‘execute’ options for each. Below this, it asks for ‘Numeric Value’. You have to enter 755 as the numeric value. After the ‘Recurse into subdirectories’, you have to check the box next to it. And finally, click on the ‘Apply to Directories only’ option and click ‘OK’.
By entering 755 as a numeric value, the FTP client sets the permissions of the folder to 755 and simultaneously to all subfolders as well in the wp-content including the folder containing the images.
One should also check and correct the file permissions in a wp-content folder for individual files as well. For doing this make rights click on a wp-content folder and then select file permissions. This we are doing to bring the required changes in our files as well. For folders we had entered 755 as a numeric value, here enter 644, and then, you need to check the box adjacent to ‘Recurse into subdirectories”. The last step is to click on the ‘Apply to files only’ option and click ‘OK’.
So now, our FTP client will show file permissions to 644 for all files and 755 to all folders and subfolders in the 2p-content folder.
 However, at times the error will continue and in such a case you have asked your hosting provider to delete all the files from the temporary files directory. While uploading the images on WordPress, it’s first saved in a temporary directory and then to the upload folder. The uploading of images is done through PHP by WordPress.
A wrongly configured temporary directory will not allow WordPress to save the file on the disk. Most of the time the temporary folder will not be accessed through FTP and in such a case you need to seek help from your web host so that he can do the required task for you. If the problem still persists, there is surely some other reason and now let’s look into it.
At times the error will still persist and when it does there is another reason for the same.
Many users get the ‘Failed to Write File to Disk Error’ due to the storage quota limit. When the user has utilized its storage quota limit, you get this error on the screen. The economical and affordable services bought from the hosting service provider look attractive but there is a downfall to it. These web host plans come with really low storage space ranging from 500MB to 2GB or so. So when one is using WordPress and has more than one website to manage the allotted 1GB storage space will soon get depleted. In such a scenario where the user has fully used its allotted storage space, the hosts disallow you to upload any more files and hence the user gets the message ‘Failed to Write File to Disk Error’.
It’s important for the user to keep a track of the usage of the allotted storage space. The storage space is generally based on the web hosting plan that the user subscribes to and therefore while finalizing the web hosting plan in the first place the user should keep the future storage space requirement in mind as well.
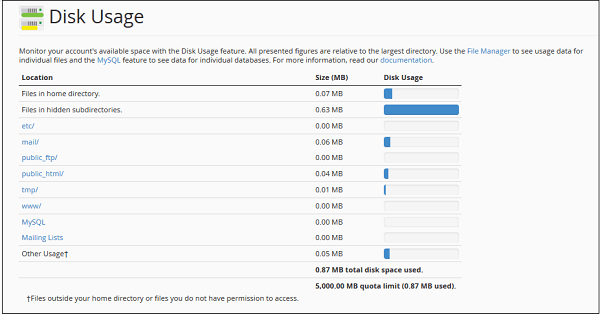
The user should always keep a close watch on the storage space usage and allocation, for this there is cPanel. The user will log in to cPanel and followed by the check on the left sidebar. The ‘Disk space usage’ tells us the total storage space allotted to us in our web hosting plan and the percentage used out of the total storage with us. Just in case the storage space is fully utilized or negligible storage space is left then it’s obviously time to shift to a hosting services provider plan which provides sufficient storage space as per your requirements. The other easy option in order to continue with the same storage space is to delete the files that do not seem to be relevant for you now.
But since running out of storage space might scenario might occur again in the near future, opting to go for a plan with larger storage space is a better choice.
So you have done the right permission settings for your files & folders, the allotted storage space is still sufficiently available, the temporary folder is also cleaned and PHP settings are also right but ‘Failed to Write File to Disk Error’ still bothers you. After all these exercises the problem still persists then the last try should be done which seems to have little technical reasoning but has solved the problem for a lot of people.
All you have to do is to take a look at your file name. If there are any spaces and dashes in the file name, then you should delete all those from the file name. Well, not always but most of the time it works.
The remedial steps for ‘Failed to Write File to Disk Error’ discussed above are sure to solve your problem. Just in case, your problem still exists then the only option remains is to get in touch with your web hosting or your website maintenance service provider, if any. You can make a phone call if this facility is available; else e-mail your problem in detail with screen snapshots which are self-explanatory in nature.
The best option however is to try a live chat with the executive from the hosting provider. This will help in sorting out your problem and guide you in the right direction. It’s relevant to mention here that whether you phone call or e-mail or chat with the executive, make sure that you explain your problem in detail without mingling words.

The other option is to post on various online forums on the Internet. The users who earlier encountered this problem will share their experiences and solutions. The experts available on these forums will also enrich you with their knowledge and insight.
WordPress has a support forum and easy help is also available in the FAQs section as well. The solution to the user problem here is swift and accurate provided the problem has been explained by the user in clear and precise words.
To conclude WordPress is a self-contained system, that lets you manage your website from your own computer with seamless efforts. It is highly SEO friendly and businesses can make the most of it by hiring an SEO services company for better visibility. The facility of having multiple users along with the admin and making your site grow as per the growth witnessed in your business makes it the first choice.


 in India