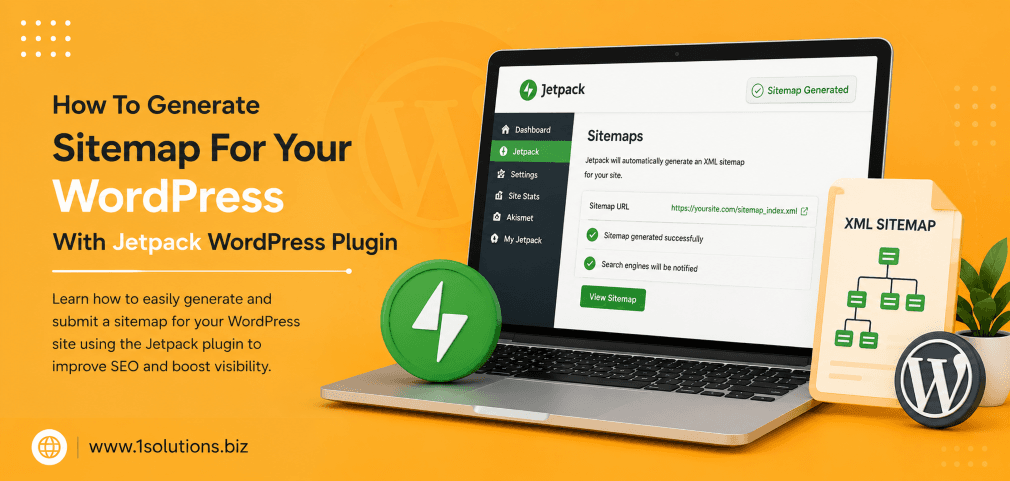
If you want search engines to find and index every page on your WordPress website, knowing how to generate a sitemap for your WordPress with Jetpack WordPress Plugin is one of the most practical skills you can develop. A sitemap acts as a roadmap for search engine crawlers, telling them exactly which pages exist, how often they are updated, and which ones matter most. Without one, even well-written content can go unnoticed by Google. Jetpack makes the process beginner-friendly while still offering enough control for experienced site owners. This guide walks you through every step, with context on why each one matters.
Jetpack’s built-in sitemap feature lets WordPress site owners generate and submit XML sitemaps without any coding. Enable the sitemap module in Jetpack settings, verify the sitemap URL, and submit it to Google Search Console to improve crawlability and indexing speed. This guide covers all 10 steps with pro tips, a comparison table, and a FAQ section.
⚡ Key Takeaways
- Jetpack generates both XML sitemaps and news sitemaps automatically once activated.
- You do not need a separate sitemap plugin if Jetpack is already installed on your site.
- Submitting your sitemap to Google Search Console accelerates the indexing process significantly.
- Jetpack sitemaps update dynamically whenever you publish or update content.
- Conflicts with other sitemap plugins can cause duplicate or broken sitemap errors — always deactivate competing plugins first.
- Proper sitemap setup is a foundational part of any professional SEO strategy.
- Monitoring your sitemap regularly prevents indexing gaps caused by excluded pages or crawl errors.
1. Understand What a Sitemap Does and Why It Matters
Before touching any settings, it helps to understand the purpose of an XML sitemap. A sitemap is a structured file, usually in XML format, that lists all the URLs on your website along with optional metadata such as the last modification date, update frequency, and priority level. Search engines like Google and Bing use this file to discover and crawl your content more efficiently.
According to Google’s own documentation (Google, 2023), sitemaps are especially useful for large sites, new sites with few external links, and sites with rich media content. Even for smaller sites, having a sitemap removes any ambiguity about which pages should be indexed. A 2022 study by Ahrefs found that nearly 56% of pages that rank in the top 10 search results belong to sites with properly configured sitemaps.
The practical benefit is straightforward: without a sitemap, a crawler must rely entirely on internal links to find your pages. If you have orphaned pages, deep navigation structures, or recently added content, a sitemap ensures nothing slips through the cracks. This is especially relevant if you are running a blog, an online store, or a content-heavy website. For a deeper look at why pages sometimes fail to get indexed despite good content, read this article on why Google is not indexing your page.
2. Install and Activate the Jetpack Plugin on Your WordPress Site
Jetpack is developed by Automattic, the same team behind WordPress.com, which gives it a level of trust and integration that few third-party plugins can match. To get started, log in to your WordPress dashboard and navigate to Plugins, then Add New. Search for “Jetpack” in the search bar. The plugin should appear at the top of the results with millions of active installations listed.
Click Install Now, then Activate. Once activated, Jetpack will prompt you to connect your site to a WordPress.com account. This connection is required for most Jetpack features, including sitemaps. If you do not have a WordPress.com account, creating one is free and takes only a few minutes. The free tier of Jetpack includes sitemap generation, so you do not need a paid plan to use this specific feature.
After connecting, you will land on the Jetpack dashboard inside WordPress. From here, you can explore the full range of features available, but for now, the focus is on the sitemap module. It is worth noting that Jetpack is a substantial plugin with many features. If your site is performance-sensitive, consider which modules you actually need and disable the rest. A bloated plugin that slows your site can offset any SEO gains from having a proper sitemap.
3. Navigate to the Jetpack Settings Panel
With Jetpack installed and connected, go to your WordPress dashboard sidebar and click on Jetpack. From the dropdown, select Settings. The Settings page is organized into several tabs: Security, Performance, Writing, Sharing, Discussion, and Traffic. For sitemap functionality, you need to click on the Traffic tab.
The Traffic tab consolidates several SEO-related features including site verification, sitemap generation, and related posts. Scroll down until you find the section labeled “Sitemaps.” You may also see options for SEO tools if you are on a paid Jetpack plan, but the sitemap section is available on the free plan as well.
Understanding the layout of Jetpack settings helps you avoid accidentally enabling features you do not need or disabling ones that are already running. Take a moment to review what is toggled on and off in the Traffic tab. Uninstructed changes to settings like “Site Verification” or “Search Engine Visibility” can inadvertently block crawlers or remove existing verification tokens. Always be deliberate with what you change.
💡 Pro Tip: Before making changes in Jetpack settings, take a screenshot of your current Traffic tab configuration. This gives you a reference point if anything goes wrong after you toggle new options.
4. Enable the Sitemap Feature in the Traffic Tab
Inside the Traffic tab, locate the Sitemaps section. You will see a toggle or checkbox labeled something like “Generate XML sitemaps” or “Enable sitemaps.” Click or toggle it to the on position. Jetpack will immediately begin generating your sitemap in the background. The process is automatic and does not require you to define pages manually or configure any file paths.
Once enabled, Jetpack creates two primary sitemap files. The first is the main XML sitemap, which includes your posts, pages, and custom post types. The second is a news sitemap designed specifically for Google News, which lists articles published within the last 48 hours. If you run a news site or publish time-sensitive content, the news sitemap is particularly valuable.
According to data from Semrush (2023), websites that submit news sitemaps to Google see indexing times as short as a few minutes after publication, compared to hours or even days for sites relying on crawl discovery alone. For standard blogs or business sites, the main sitemap is sufficient, but enabling both costs nothing and provides a small but real advantage. Once you save your settings, Jetpack handles the rest automatically, updating the sitemap every time you add or modify content.
5. Locate Your Jetpack-Generated Sitemap URL
After enabling the sitemap, you need to know its URL so you can submit it to search engines and reference it in your robots.txt file. By default, Jetpack places the sitemap at a predictable location. Your main sitemap will be accessible at: yoursite.com/sitemap.xml. The news sitemap will be at yoursite.com/news-sitemap.xml.
Open a new browser tab and type your domain followed by /sitemap.xml. If the sitemap is working correctly, you will see a structured XML file listing your pages. If the URL returns a 404 error, there are a few common culprits: your permalink settings may need to be refreshed, or another plugin may be conflicting with Jetpack’s sitemap output.
To refresh permalink settings, go to Settings in your WordPress dashboard, then Permalinks, and simply click Save Changes without altering anything. This flushes the rewrite rules and often resolves 404 errors on sitemap URLs. If the problem persists, deactivate other SEO or sitemap plugins temporarily and test again. Competing sitemap generators from plugins like Yoast SEO or All in One SEO can override or conflict with Jetpack’s output.
6. Add Your Sitemap to the robots.txt File
A robots.txt file tells search engine crawlers which parts of your site they can and cannot access. It also serves as a centralized reference point for your sitemap URL. Adding a sitemap directive to robots.txt ensures that any crawler visiting your site can immediately locate your sitemap, even before you submit it manually through Search Console.
WordPress generates a virtual robots.txt file automatically if no physical one exists in your root directory. You can edit this file through Jetpack itself, through another SEO plugin, or via FTP. The directive to add is simple: Sitemap: https://yoursite.com/sitemap.xml. Place this line at the bottom of your robots.txt file, after any disallow rules.
This step is often overlooked by beginners, but it is a genuine best practice recommended by Google’s Search Central documentation (Google, 2023). Crawlers like Bingbot and various AI indexing bots also read robots.txt as part of their site discovery process. If you are working on a broader SEO initiative and want to understand how search technology is evolving, the article on how Google’s new WebMCP protocol impacts SEO provides useful context on how crawlers are changing.
💡 Pro Tip: Never add a Disallow: / rule to your robots.txt file unless you specifically want to block all crawlers. This is a common mistake that accidentally prevents Google from indexing your entire site.
7. Submit Your Sitemap to Google Search Console
Generating a sitemap is only half the job. Submitting it directly to Google Search Console (GSC) tells Google exactly where your sitemap lives and prompts faster crawling. If you have not yet verified your WordPress site in GSC, do that first. Jetpack’s Traffic tab includes a field for Google Search Console verification, making the process easier without requiring you to paste code into your theme files.
Once your site is verified, log in to Google Search Console and select your property. In the left sidebar, click on Sitemaps under the Index section. In the “Add a new sitemap” field, enter your sitemap URL, typically sitemap.xml (you do not need to include the full domain since GSC already knows it). Click Submit. If Jetpack is generating the sitemap correctly, GSC will show a success status within a few minutes to a few hours.
After submission, GSC will display data on how many URLs were submitted versus how many were indexed. This is one of the most useful diagnostics available to site owners. If many URLs appear as submitted but not indexed, the issue is usually related to content quality, canonicalization, or crawl budget, not the sitemap itself. For a comprehensive look at boosting your overall indexing performance, explore how page content analysis can improve your SEO efforts.
8. Handle Plugin Conflicts and Common Sitemap Errors
One of the most frequent issues WordPress users encounter when generating sitemaps with Jetpack is conflict with other plugins. Yoast SEO, Rank Math, and All in One SEO all generate their own sitemaps and often claim the /sitemap.xml URL. When two plugins fight over the same path, the result is either a blank page, a 500 error, or one plugin silently overriding the other.
The safest approach is to pick one sitemap solution and stick with it. If you are using Jetpack for sitemaps, disable the sitemap feature inside any other SEO plugins. In Yoast, for example, go to SEO, then General, then Features, and toggle off XML sitemaps. In Rank Math, visit Rank Math, then Sitemap Settings, and disable it there. After making these changes, flush your permalinks again and recheck your sitemap URL.
Another common error is an incomplete sitemap that excludes certain post types or taxonomies. Jetpack includes posts and pages by default, but custom post types such as products, portfolios, or events may or may not appear depending on how they were registered. If you run a WooCommerce store, you may need a more specialized setup. The WooCommerce store maintenance checklist covers sitemap considerations alongside other technical requirements for keeping an e-commerce site healthy.
9. Compare Jetpack Sitemaps Against Other WordPress Sitemap Solutions
Jetpack is not the only way to generate a sitemap in WordPress, and it is worth understanding how it compares to the alternatives before committing to it as your long-term solution.
| Feature | Jetpack | Yoast SEO | Rank Math | Google XML Sitemaps |
|---|---|---|---|---|
| Free Plan Available | Yes | Yes | Yes | Yes |
| News Sitemap | Yes | Premium only | Yes (free) | No |
| Image Sitemap | Limited | Yes | Yes | No |
| Video Sitemap | No | Premium only | Yes (free) | No |
| Auto-Updates Sitemap | Yes | Yes | Yes | Yes |
| GSC Integration | Partial | Yes | Yes | No |
| Setup Complexity | Low | Medium | Medium | Low |
Jetpack’s biggest advantage is simplicity. If you are already using Jetpack for other features like security scanning or CDN, adding sitemap generation adds zero extra overhead. However, if you need advanced sitemap customization, video sitemaps, or tighter SEO tooling integration, Rank Math offers more granular control on the free tier. The right choice depends on your site’s specific needs and how much configuration you are willing to manage. If you want help choosing the right technical SEO setup for your WordPress site, working with a professional WordPress development team can save significant time and prevent costly configuration mistakes.
💡 Pro Tip: If you are running an e-commerce store on WooCommerce, consider whether Jetpack’s sitemap covers your product pages, product categories, and variable products. Missing these from your sitemap can slow down indexing of your most revenue-critical pages.
10. Monitor, Maintain, and Optimize Your Sitemap Over Time
Generating a sitemap is not a one-time task. Ongoing monitoring ensures that your sitemap remains accurate and that Google continues to index new content promptly. Jetpack automatically updates the sitemap when you publish or edit content, but several situations can cause the sitemap to become outdated or inaccurate without any obvious warning signs.
Log in to Google Search Console at least once a month and check the Sitemaps report. Look for discrepancies between submitted URLs and indexed URLs. If the number of indexed pages drops suddenly, it could indicate that pages were removed, marked as noindex, or blocked by robots.txt. A 2021 study by Moz found that crawl errors and indexing gaps are among the top five technical SEO issues affecting organic search performance, meaning regular audits are not optional — they are essential.
Also watch for sitemap size limits. Jetpack, like all sitemap solutions, adheres to the standard limit of 50,000 URLs per sitemap file. If your site grows beyond that, you will need a sitemap index file that references multiple sitemap files. Most large-scale sites manage this with a dedicated sitemap plugin or custom development. If you are scaling up your content strategy and want your SEO to keep pace, exploring key SEO strategies for Google News article ranking and understanding how to boost SEO through page content analysis can help you stay ahead. For businesses that want consistent, expert-level results, partnering with a team that offers dedicated search engine optimization services ensures that sitemap health is just one part of a broader, well-managed SEO operation.
Practical Action Plan: What to Do With Your Jetpack Sitemap
- Do This Now: Enable the Jetpack sitemap feature in your Traffic settings and verify that yoursite.com/sitemap.xml loads correctly in your browser. Then submit it to Google Search Console immediately. These two steps alone will have the highest immediate impact on your site’s crawlability.
- Worth Doing: Add the sitemap directive to your robots.txt file, check for plugin conflicts with other SEO tools, and confirm that your most important pages (posts, pages, and product listings) are all appearing in the sitemap. Also submit to Bing Webmaster Tools for broader search coverage.
- Low Priority: Explore whether you need a news sitemap, investigate advanced sitemap customization options, or consider migrating to a more feature-rich plugin like Rank Math if Jetpack’s sitemap coverage is proving insufficient for your site’s complexity.
Frequently Asked Questions
Does Jetpack generate a sitemap automatically after installation?
No, you need to manually enable the sitemap feature inside the Jetpack settings panel under the Traffic tab. Once toggled on, the sitemap is generated and updated automatically going forward. Installation alone does not activate every Jetpack feature by default.
Can I use Jetpack sitemaps alongside Yoast SEO?
Using both simultaneously is not recommended because they can create conflicting sitemap files at the same URL. If you want to use Jetpack for sitemaps, disable the XML sitemap feature inside Yoast SEO. If you prefer Yoast’s sitemap, disable it in Jetpack instead. Pick one and deactivate the other to avoid errors.
Where is my Jetpack sitemap located?
By default, your Jetpack-generated sitemap is located at yoursite.com/sitemap.xml. The news sitemap, if enabled, is at yoursite.com/news-sitemap.xml. If these URLs return 404 errors, try flushing your permalink settings by visiting Settings, then Permalinks, and clicking Save Changes.
Will Jetpack include WooCommerce product pages in the sitemap?
Jetpack’s sitemap typically includes standard post types registered with WordPress. WooCommerce product pages are registered as a custom post type, and whether they appear in the Jetpack sitemap depends on how WooCommerce registers them and which version of Jetpack you are using. Testing your sitemap URL after enabling it will confirm whether products appear. If they do not, a dedicated WooCommerce sitemap plugin or Rank Math may be a better fit.
How often does Jetpack update the sitemap?
Jetpack updates the sitemap dynamically whenever content is published, updated, or deleted. There is no manual refresh required. However, the update may not be instantaneous in all cases. If you publish content and do not see it in the sitemap within a few hours, check for caching conflicts from your hosting environment or caching plugins, as these can sometimes serve a stale version of the sitemap file.